The Steamy Kitchen Cookbook: Firecracker Shrimp and a Really Cute Giveaway!

Firecracker Shrimp Appetizer

Firecracker Shrimp, Photo by Jaden Hair

“A girl’s gotta eat!” quips Jaden Hair, self-taught cook, creator of the popular food blog Steamy Kitchen, and most recently, author of The Steamy Kitchen Cookbook.

This is the kind of sass and practicality that makes Jaden’s work so enjoyable and relatable. Her new book is dubbed, “101 Asian Recipes Simple Enough for Tonight’s Dinner” and features fast, simple, and delicious recipes passed down from her mom and inspired by her fellow food bloggers.
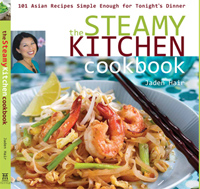
The Steamy Kitchen Cookbook

I first met Jaden at the BlogHer Food conference a few months ago, and was struck by her focus, drive, and of course, her sparkling personality. Judging from her expansive multi-media reach (Jaden is workin’ it – not only does she have a blog and book, she also writes a weekly column for the Tampa Tribune and has a syndicated show on Tampa Bay’s CBS10), it’s hard to believe that she’s only been at this whole food thing for 2 ½ years.

(Other than feeling a little bad about myself) I find inspiration in her hustle. It was a pleasure chatting with Jaden, and I found myself nodding and smiling as her enthusiasm flowed through the phone line.

It wasn’t until she moved away from San Francisco to a suburb of Tampa, devoid of good Asian markets and her mother’s home cooking, that Jaden learned to cook. She earned her culinary degree via a $448.63 cell phone bill, and when I read her dedication on the front page of her book (”To my Mom, who spent thousands of hours reciting family recipe over the phone…and to my Dad, who patiently translated when our Chinglish didn’t suffice.”), I was reminded of my own inadequate Chinglish…and all the times I called my own mom from the grocery store, or begged her to just estimate how much soy sauce/rice vinegar/black bean sauce she used in a dish so I could piece together some semblance of a recipe.

Steamy Kitchen honors the passing down of recipes from generation to generation, from friend to friend, and recognizes that in doing so, it becomes more than just a recipe, but a tangible expression of family and community. I love that. I also love that the cookbook lends a real-life perspective on learning how to take what you have available and adapt it to your family meal. And, I love that this is a “homegrown” cookbook, written, styled, and photographed by Jaden herself. (True fact, the photos where you see her hands preparing a dish were taken by her 4-year-old son via tripod, wireless remote clicker, and chocolate bribe.)

Below is a recipe for Firecracker Shrimp, straight from The Steamy Kitchen Cookbook. It is a recipe that has become a regular at Jaden’s dinner parties, and she warns, they rarely make it to the table because guests stand in the kitchen snagging them as they cool on the rack. The recipe is originally from Rice and Noodles by Mae Gabriel, a blog that inspired Jaden to take food photography seriously.

A good indication of the other dishes in The Steamy Kitchen Cookbook, these Firecracker Shrimp are enticing and accessible. And, I’m fairly certain they won’t be making it past the cooling rack at my next party either.

**********

Firecracker Shrimp

From The Steamy Kitchen Cookbook by Jaden Hair

Serves: 4-6 as appetizer

Ingredients:
1 tablespoon cornstarch or flour
¼ cup water
24 medium tail-on shrimp, shelled (leave tails on) and deveined
½ teaspoon salt
Freshly ground black pepper
1 cup sweet chilli sauce, divided *Recommended brands: Mae Ploy and Lingham (thicker, spicier and less sweet than Mae Ploy)
12 eggroll or fresh spring roll wrappers, cut in half diagonally and covered with plastic wrap or a damp cloth
High-heat cooking oil for frying

Preparation:
1) In a small bowl, mix the cornstarch with the water to make a slurry.
2) Lay the shrimp flat on a cutting board and using a sharp paring knife, cut a few nicks on the inside curve of the shrimp. Be careful not to cut through the shrimp. Pat the shrimp very dry.
3) Season the shrimp with the salt and pepper. Pour ¼ cup of the sweet chilli sauce on a small plate. Hold the shrimp by its tail and dip both sides of the shrimp in the sweet chilli sauce. Avoid getting the tails wet (if the tail of the shrimp is wet with marinade, it will splatter in the hot oil). Let the shrimp marinade for 10 minutes at room temperature.
4) Use paper towels to pat the shrimp slightly, to soak up the extra marinade. Some of the sticky sweet chilli sauce should still be on the shrimp.
5) Roll the shrimp in the halved wrappers, following the instructions below.
6) In a wok, deep fryer or large sauté pan, add 1 ½ inches of oil and heat it to 375 degrees F. Add the firecracker shrimp a few at a time to the oil and fry until golden brown on each side, about 3 minutes. Drain on a baking rack and serve with a side of sweet chilli sauce for dipping.

Option: Add a thin slice of mango with the shrimp with wrapping to make Firecracker Mango Shrimp.

Step by Step Wrapping

Rolling the Shrimp Wrapper
1) Lay an eggroll or spring roll wrapper on a dry, clean surface as shown. Lay a shrimp with the tail sticking out.
2) Bring the left corner of the wrapper over the shrimp and being rolling left to right. Make sure that you are rolling tightly. As you roll, bring the top corner o the wrapper down and over the shrimp. Again, make sure you leave no open pockets of air. Big air pockets and holes will allow oil to seep in.
3) Continue rolling towards the right. Dip your finger or a pastry brush into the cornstarch slurry and pain the final corner. Roll to seal. Lay the roll seam side down on a dry plate or tray. Repeat with the rest of the shrimp and wrappers. Keep all uncooked Firecracker Shrimp covered with plastic wrap or barely damp towel.

Creamy Almond Bark

There’s a million things you can make with white and chocolate candy coating (or bark, as some people call it). It’s very easy to make a simple, yet yummy snack or dessert. During the holidays I probably use about 20 pounds of this stuff! I use it for oreo balls, chocolate covered pretzel rods, peppermint bark, ritz treats, you name it! A new creation I found to make with chocolate bark is this Creamy Almond Bark. It not only uses this yummy white candy coating, but sweetened condensed milk…another favorite!

Creamy Almond Bark

creamyalmondbark

Printable Version: Creamy Almond Bark

Ingredients

  • 1 1/2 pounds vanilla-flavored candy coating (or almond bark)
  • 1 (14 oz.) can Eagle Brand Sweetened Condensed Milk
  • 1/8 teaspoon salt
  • 1 teaspoon almond extract
  • 3 cups (about 1 pound) whole almonds, toasted*

To add a sweet little twist, you can add dried cranberries or blueberries! I’ve had it with the cranberries and love it!

You can also use chocolate bark rather than the white chocolate. It’s great, too!

ChocolateAlmondBark

Directions

Melt candy coating, sweetened condensed milk and salt in a heavy saucepan over low heat. Remove from heat. Stir in almond extract, then almonds.
Spread evenly into wax paper-lined 15 x 10-inch jellyroll pan. Chill 2 hours or until firm.
Turn onto cutting board. Peel off paper; cut into triangles or squares. Store leftovers tightly covered at room temperature.

Microwave Method
Combine candy coating, sweetened condensed milk and salt in 2-quart glass measure. Microwave on HIGH (100% power) 3 to 5 minutes, stirring after each 1 1/2 minutes. Stir until smooth. Proceed as above.
**To toast almonds, spread in single layer in heavy-bottomed skillet. Cook over medium heat 2 to 3 minutes, stirring frequently, until nuts are lightly browned. Remove from skillet immediately. Cool before using.

Sunshine’s “Secret” Fudge

Baking for others is one of my favorite things to do during the holidays. I enjoy making treats for others because they know it comes from the heart. I have always enjoyed baking (desserts mostly) and have always found it so much fun to make all kinds of goodies and wrap them in cute gift bags using fun ribbons and gift tags for friends and family as gifts. The recipe I am about to share with you is my all-time favorite thing to make during the holidays. It is SO simple to make…..and VERY, VERY good (if I do say so myself)!!

My secret fudge…. I know, it’s not much of a secret if I’m sharing the recipe with all of you, but the source of my recipe is a secret….because if I told you, you wouldn’t believe me!

Ok, ok, you twisted my arm….I’ll tell you. I found it on the back of a marshmallow cream jar!! : ) I TOLD you, you wouldn’t believe me!! It may be from the back of a marshmallow cream jar, but you have never tasted better fudge. Or found fudge that was easier to make!

I have many variations to my fudge; plain fudge, fudge with nuts, peanut butter and chocolate fudge (tastes even better than a Reese’s Peanut Butter Cup if you can imagine that!), white chocolate fudge, you get the picture. And it so easy to make all of these variations of flavors because this fudge is make with chocolate chips! And these days, you can find all kinds of flavored chocolate chips which you can turn in to fudge!
Now, on to the recipe….

Sunshine’s “Secret” Fudge

sunshinessecretfudge

Printable Recipe: Sunshine’s “Secret” Fudge

Ingredients:

  • 3 cups sugar
  • 3/4 cup margarine
  • 2/3 cup evaporated milk
  • 1 12-oz. package chocolate chips (or whatever flavor chocolate chips you desire: peanut butter, white chocolate, mint, etc)
  • 1 7-oz. jar Kraft Marshmallow Cream
  • 1 cup chopped nuts, optional
  • 1tsp. Vanilla

Directions:

Combine sugar, margarine and milk in heavy 2-1/2 quart saucepan; bring to full rolling bail, stirring constantly (and you have to stir constantly or it will burn, trust me!). Continue boiling 5 minutes over medium heat, stirring. Remove from heat, stir in chocolate till melted. Add marshmallow cream, nuts (if desired) & vanilla; beat until blended. Pour into greased 13 x 9-inch baking pan. Let cool and cut into 1-inch squares.

**To make layered fudge (like peanut butter and chocolate, I usually make one batch of each flavor and split it in to two 9X13 pans. Make one flavor first (ex: peanut butter) pour it in to the two pans. Let that layer cool while you make the next batch (I usually put it in the fridge). Make the next batch with the other flavor (ex: choc.) and pour it on top. This way they will not mix in to each other and get all messy.

See, it couldn’t be easier and everyone is SURE to love it! It’s always the go-to holiday recipe for me. I hope you enjoy and have a Merry Christmas!

Party Perfect Walnut Date Cups

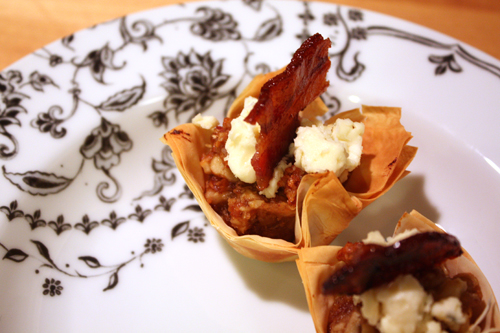
Walnut Date Cups with Blue Cheese and Candied Bacon

Walnut Date Cups with Blue Cheese and Candied Bacon

These fancy little walnut date cups are the perfect savory-sweet treat for a special holiday brunch or cocktail party. It’s a prettier take on one of my favorite easy appetizers, a nut and blue cheese-stuffed date wrapped in bacon and broiled until crispy and caramelized.

For this dressed up version, the walnut and dates are ground together and combined to form the heart of this delightful bite. The mellow, nutty flavor of the walnuts is brought out by the natural sweetness of the dates, and the orange adds a bright, floral note to the mix. The blue cheese is just pungent enough to bring some depth to the flavors, the candied bacon is pure indulgence, and the phyllo cup is a crispy, edible vessel for it all!

Woo woo! Extra bonus, this recipe/video we made won the Video category in California Walnuts’ Holiday Baking Challenge!!! Thanks, Walnuts :) And extra thanks, Hua, for your videography skills.

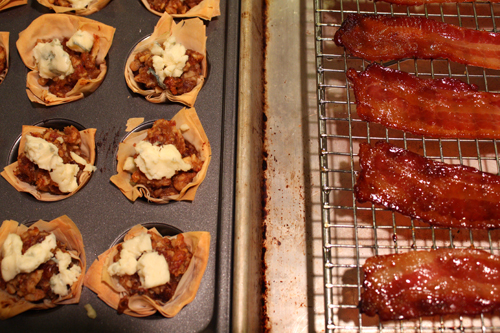
I did have some trouble getting the candied bacon as crispy as I wanted it (I was shooting for a brittle texture that I could snap into shards). Any consummate bacon confectioners out there who can shed some light?

Crispy Nutty Date Cups meet Candied Bacon

Crispy Nutty Date Cups meet Candied Bacon

Walnut Date Cups with Blue Cheese and Candied Bacon

Servings: 24 pieces

Ingredients:
1 cup walnuts, toasted
12 ounces Medjool dates, pitted
1 teaspoon orange zest
2 tablespoons fresh orange juice
4 (18”x12”) sheets frozen phyllo dough, thawed and brought to room temperature
3 tablespoons unsalted butter, melted
½ cup blue cheese, crumbled (Recommended: Point Reyes original blue)
Candied Bacon

Special Equipment:
24-count mini muffin pan
2 baking sheets
Microplane or grater
Parchment paper

Preparation:
1. Make Candied Bacon (see recipe below) and set aside to cool.
2. Place an oven rack in the center of the oven and preheat to 375 degrees F.
3. In a food processor, pulse together the walnuts, dates, orange zest, and orange juice until a coarse, nutty spread is formed. I prefer my filling on the chunky side, but evenly combined.
4. Place a sheet of phyllo dough on a work surface. Brush the dough with melted butter. Place another sheet of dough on top and brush with melted butter. Repeat until you have 4 sheets of dough stacked.
5. Using a sharp knife, cut the dough into 24 (3-inch) square pieces.
6. Gently press each piece of dough into the muffin pan. Spoon the walnut and date filling into the cups.
7. Bake for 12 to 14 minutes until the pastry is golden. Remove from the oven and let the phyllo cups cool for 10 minutes.
8. Using a small spoon, remove the phyllo cups from the pan. Arrange the cups on a platter, top each one with a little blue cheese and garnish with a piece of candied bacon. Serve immediately.

****************

Candied Bacon
Recipe adapted from Alex Guarnaschelli

Ingredients:
3 slices bacon, about 1/4-inch thick (or more, for fun)
1/4 cup brown sugar

Preparation:
1. Preheat the oven to 325 degrees F.
2. Sprinkle the bacon with the brown sugar, coating both sides.
3. Cover a baking sheet with parchment paper and arrange the bacon in a single layer on top. Place a second piece of parchment paper on top, and cover with another baking sheet. The baking sheet will keep the bacon from curling up as it cooks.
4. Place the tray in the center of the oven and bake for 20 minutes. If it is not golden brown and crispy, bake it for another 10 to 15 minutes.
5. Transfer the bacon to a wire rack (not paper towels because the sugar will make it stick) and let it harden up a bit more. Break each strip into small shards. Set aside for garnishing.

Bagel Express (Purveyor of Happiness)

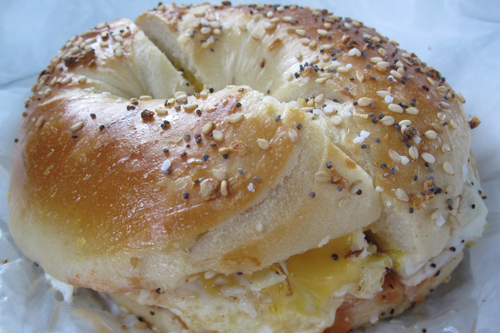
The perfect breakfast sandwich, Bagel Express

The perfect breakfast sandwich, Bagel Express

I was going to take a little holiday respite from blogging while I was home on the East coast but Holy Christmas, this was just too good to keep to myself. Not an hour back in Jerz, straight off the red-eye, and I was walking blurry-eyed into one of my favorite places in the world: a NJ bagel shop.

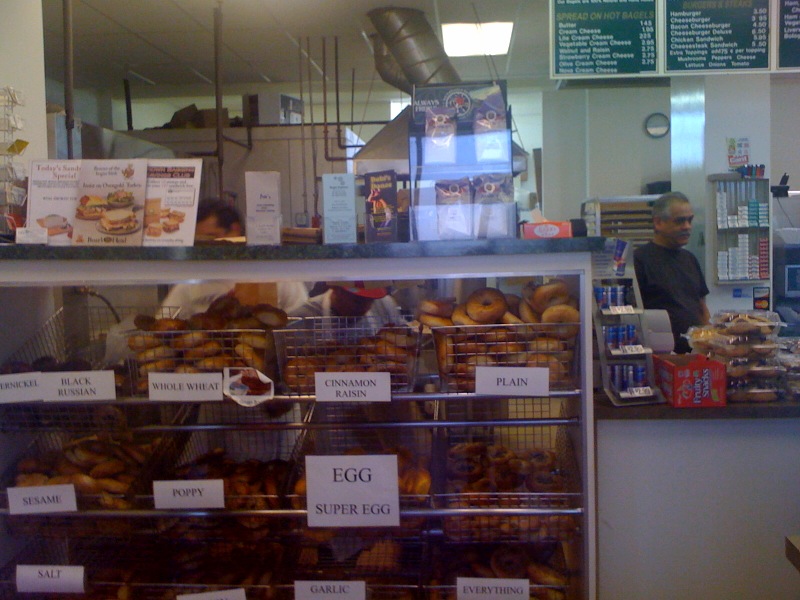
This bagel shop in particular (Bagel Express) is relatively new to the hood, my dad tells me, but it has quickly risen the ranks to Favorite status, and fufills all the Jersey Bagel Shop requisites:

  • Everyone knows everyone’s name. The regulars all come in busting chops and the bagel guys dish out the banter alongside the shmear.
  • At least two cops come in while you wait for your bagel to toast.
  • Every other person on line looks and sounds like they stepped right out of The Sopranos.

Bagel Express, Mahwah, NJ

Bagel Express, Mahwah, NJ

Ambiance aside, what moved me to impulse-post were the mind-blowingly delicious bagels we devoured this morning. A bite of that perfectly boiled and baked, chewy on the inside/crunchy on the outside piece of heaven was like Mother Jersey hugging me to her bosom and welcoming me home.

I know people usually equate bagels with NY, but dare I say (I do, I dare), while the bagel may have gained its fame in NY, it has been perfected in NJ. In Mahwah, NJ to be exact.

At Bagel Express, the texture is sublime. The flavor is nice and salty. The execution is perfect.

I am a purist and got my piping hot bagel with a brick of cream cheese slabbed on and some fresh tomato. Hua and Dad got the classic breakfast sandwich with sausage, egg, and cheese. Hua got a second road sandwich. Told you, these really are that good.

For my Bay Area readers I have a burning question: Why doesn’t SF know about bagels?? They know about every other thing delicious…what’s with the bagel void? Hmmmm?

Ok, signing out. Blissful carb coma has hit.

Sam Sam Korean Food, The Gardens

When I told Diha about cheap korean food at LG floor at The Gardens, she insisted that it's not as nice compared to the korean stall located at the Food Gardens upstairs.
It totally slipped my mind, until I walked past the food court during dinner time recently and realised I've not tried the korean stall.. :p
Sam Sam Korean Food is located very near the entrance, you wont miss it.
Even if you did, you wont miss the 'an nyong ha sye yo' greetings by the owners- a cheerful husband and wife team.
The food selection was very simple- just a few dishes to choose from- ranging from bibimbap, grilled meats and soupy concoction.
They recommended the Dolsat Bibimbap (RM13.90) and Bulgogi Set(RM15)..and so our orders were set..
My Beef bibimbap was served with a fried egg, the yolk still runny...
Mix it all up, and I get a good range of vegetables, rice and meat with every spoonful. The hot stone bowl kept my rice hot and flavourful, it was really enjoyable eating the bibimbap. Very nice indeed.
Amy's Bulgogi came boiling hot...
Slightly soupy looking compared to the rest of the bulgogi I've seen, this was a real wholesome, satisfying dish. The gravy was thick but was excellent with white rice, the beef pieces were tender and gamey (which I like :P) and there were generous amount of glass noodles and vegetables.
Sam Sam Korean Food is located at Stall No 12, Food Gardens, The Gardens, Mid Valley City, Lingkaran Syed Putra, 59200 Kuala Lumpur.

Home's Cafe

This place is cooler than the Old Town nearby. We always ended up going somewhere else due to it's tough to get group seats for our gang during lunch hours.


White Coffee (RM2.60). Not bad! The Home's Cafe brand coffee has always been someone's favourite 3-in-1 coffee. The Hazelnut one will be even more fragant after bancuh.


Teh Tarik (RM3.40) , Kaya Butter Toast (RM2.40). I was surprised to find that the toast is actually not bad, impressed.


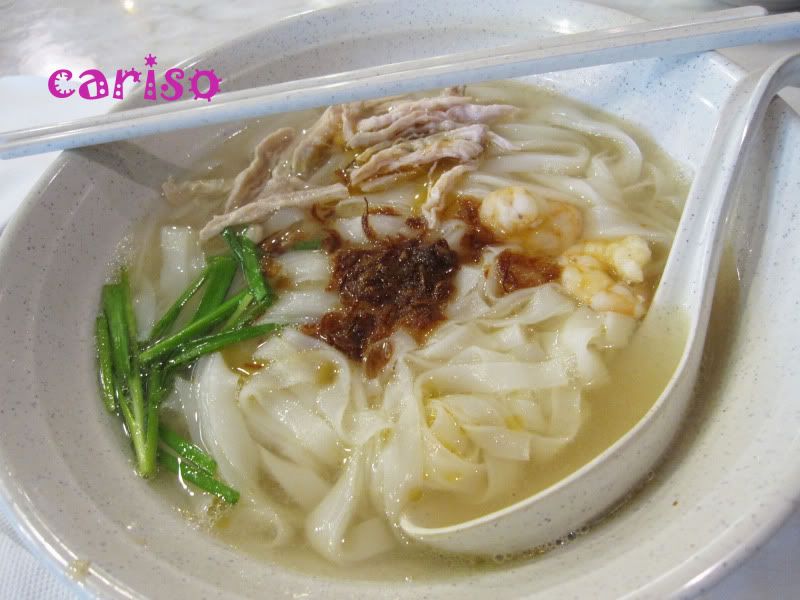
Ipoh Hor Fun (RM5.90). Totally beh khi. Cannot compare with Old Town one at all. Why?! The taste was really one kind, most probably from the hor fun that was not being washed properly. The serving is big but with this weird taste, I definitely won't be back for THIS.


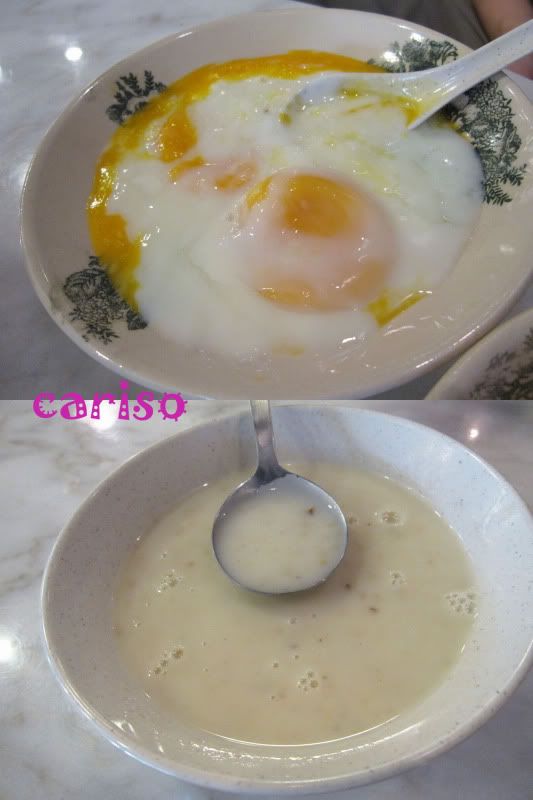
Boiled Eggs (RM2.00), Mushroom soup (RM4.00) . Mushroom was so so, instant type. Boiled eggs, hmm....they let you crack the eggs yourselves. I like it this way.


10% service charge applies. All food items are pork or lard free.