The Steamy Kitchen Cookbook: Firecracker Shrimp and a Really Cute Giveaway!

Firecracker Shrimp Appetizer

Firecracker Shrimp, Photo by Jaden Hair

“A girl’s gotta eat!” quips Jaden Hair, self-taught cook, creator of the popular food blog Steamy Kitchen, and most recently, author of The Steamy Kitchen Cookbook.

This is the kind of sass and practicality that makes Jaden’s work so enjoyable and relatable. Her new book is dubbed, “101 Asian Recipes Simple Enough for Tonight’s Dinner” and features fast, simple, and delicious recipes passed down from her mom and inspired by her fellow food bloggers.

The Steamy Kitchen Cookbook

I first met Jaden at the BlogHer Food conference a few months ago, and was struck by her focus, drive, and of course, her sparkling personality. Judging from her expansive multi-media reach (Jaden is workin’ it – not only does she have a blog and book, she also writes a weekly column for the Tampa Tribune and has a syndicated show on Tampa Bay’s CBS10), it’s hard to believe that she’s only been at this whole food thing for 2 ½ years.

(Other than feeling a little bad about myself) I find inspiration in her hustle. It was a pleasure chatting with Jaden, and I found myself nodding and smiling as her enthusiasm flowed through the phone line.

It wasn’t until she moved away from San Francisco to a suburb of Tampa, devoid of good Asian markets and her mother’s home cooking, that Jaden learned to cook. She earned her culinary degree via a $448.63 cell phone bill, and when I read her dedication on the front page of her book (”To my Mom, who spent thousands of hours reciting family recipe over the phone…and to my Dad, who patiently translated when our Chinglish didn’t suffice.”), I was reminded of my own inadequate Chinglish…and all the times I called my own mom from the grocery store, or begged her to just estimate how much soy sauce/rice vinegar/black bean sauce she used in a dish so I could piece together some semblance of a recipe.

Steamy Kitchen honors the passing down of recipes from generation to generation, from friend to friend, and recognizes that in doing so, it becomes more than just a recipe, but a tangible expression of family and community. I love that. I also love that the cookbook lends a real-life perspective on learning how to take what you have available and adapt it to your family meal. And, I love that this is a “homegrown” cookbook, written, styled, and photographed by Jaden herself. (True fact, the photos where you see her hands preparing a dish were taken by her 4-year-old son via tripod, wireless remote clicker, and chocolate bribe.)

Below is a recipe for Firecracker Shrimp, straight from The Steamy Kitchen Cookbook. It is a recipe that has become a regular at Jaden’s dinner parties, and she warns, they rarely make it to the table because guests stand in the kitchen snagging them as they cool on the rack. The recipe is originally from Rice and Noodles by Mae Gabriel, a blog that inspired Jaden to take food photography seriously.

A good indication of the other dishes in The Steamy Kitchen Cookbook, these Firecracker Shrimp are enticing and accessible. And, I’m fairly certain they won’t be making it past the cooling rack at my next party either.

**********

Firecracker Shrimp

From The Steamy Kitchen Cookbook by Jaden Hair

Serves: 4-6 as appetizer

Ingredients:
1 tablespoon cornstarch or flour
¼ cup water
24 medium tail-on shrimp, shelled (leave tails on) and deveined
½ teaspoon salt
Freshly ground black pepper
1 cup sweet chilli sauce, divided *Recommended brands: Mae Ploy and Lingham (thicker, spicier and less sweet than Mae Ploy)
12 eggroll or fresh spring roll wrappers, cut in half diagonally and covered with plastic wrap or a damp cloth
High-heat cooking oil for frying

Preparation:
1) In a small bowl, mix the cornstarch with the water to make a slurry.
2) Lay the shrimp flat on a cutting board and using a sharp paring knife, cut a few nicks on the inside curve of the shrimp. Be careful not to cut through the shrimp. Pat the shrimp very dry.
3) Season the shrimp with the salt and pepper. Pour ¼ cup of the sweet chilli sauce on a small plate. Hold the shrimp by its tail and dip both sides of the shrimp in the sweet chilli sauce. Avoid getting the tails wet (if the tail of the shrimp is wet with marinade, it will splatter in the hot oil). Let the shrimp marinade for 10 minutes at room temperature.
4) Use paper towels to pat the shrimp slightly, to soak up the extra marinade. Some of the sticky sweet chilli sauce should still be on the shrimp.
5) Roll the shrimp in the halved wrappers, following the instructions below.
6) In a wok, deep fryer or large sauté pan, add 1 ½ inches of oil and heat it to 375 degrees F. Add the firecracker shrimp a few at a time to the oil and fry until golden brown on each side, about 3 minutes. Drain on a baking rack and serve with a side of sweet chilli sauce for dipping.

Option: Add a thin slice of mango with the shrimp with wrapping to make Firecracker Mango Shrimp.

Step by Step Wrapping

Rolling the Shrimp Wrapper
1) Lay an eggroll or spring roll wrapper on a dry, clean surface as shown. Lay a shrimp with the tail sticking out.
2) Bring the left corner of the wrapper over the shrimp and being rolling left to right. Make sure that you are rolling tightly. As you roll, bring the top corner o the wrapper down and over the shrimp. Again, make sure you leave no open pockets of air. Big air pockets and holes will allow oil to seep in.
3) Continue rolling towards the right. Dip your finger or a pastry brush into the cornstarch slurry and pain the final corner. Roll to seal. Lay the roll seam side down on a dry plate or tray. Repeat with the rest of the shrimp and wrappers. Keep all uncooked Firecracker Shrimp covered with plastic wrap or barely damp towel.

Creamy Almond Bark

There’s a million things you can make with white and chocolate candy coating (or bark, as some people call it). It’s very easy to make a simple, yet yummy snack or dessert. During the holidays I probably use about 20 pounds of this stuff! I use it for oreo balls, chocolate covered pretzel rods, peppermint bark, ritz treats, you name it! A new creation I found to make with chocolate bark is this Creamy Almond Bark. It not only uses this yummy white candy coating, but sweetened condensed milk…another favorite!

Creamy Almond Bark

creamyalmondbark

Printable Version: Creamy Almond Bark

Ingredients

  • 1 1/2 pounds vanilla-flavored candy coating (or almond bark)
  • 1 (14 oz.) can Eagle Brand Sweetened Condensed Milk
  • 1/8 teaspoon salt
  • 1 teaspoon almond extract
  • 3 cups (about 1 pound) whole almonds, toasted*

To add a sweet little twist, you can add dried cranberries or blueberries! I’ve had it with the cranberries and love it!

You can also use chocolate bark rather than the white chocolate. It’s great, too!

ChocolateAlmondBark

Directions

Melt candy coating, sweetened condensed milk and salt in a heavy saucepan over low heat. Remove from heat. Stir in almond extract, then almonds.
Spread evenly into wax paper-lined 15 x 10-inch jellyroll pan. Chill 2 hours or until firm.
Turn onto cutting board. Peel off paper; cut into triangles or squares. Store leftovers tightly covered at room temperature.

Microwave Method
Combine candy coating, sweetened condensed milk and salt in 2-quart glass measure. Microwave on HIGH (100% power) 3 to 5 minutes, stirring after each 1 1/2 minutes. Stir until smooth. Proceed as above.
**To toast almonds, spread in single layer in heavy-bottomed skillet. Cook over medium heat 2 to 3 minutes, stirring frequently, until nuts are lightly browned. Remove from skillet immediately. Cool before using.

Sunshine’s “Secret” Fudge

Baking for others is one of my favorite things to do during the holidays. I enjoy making treats for others because they know it comes from the heart. I have always enjoyed baking (desserts mostly) and have always found it so much fun to make all kinds of goodies and wrap them in cute gift bags using fun ribbons and gift tags for friends and family as gifts. The recipe I am about to share with you is my all-time favorite thing to make during the holidays. It is SO simple to make…..and VERY, VERY good (if I do say so myself)!!

My secret fudge…. I know, it’s not much of a secret if I’m sharing the recipe with all of you, but the source of my recipe is a secret….because if I told you, you wouldn’t believe me!

Ok, ok, you twisted my arm….I’ll tell you. I found it on the back of a marshmallow cream jar!! : ) I TOLD you, you wouldn’t believe me!! It may be from the back of a marshmallow cream jar, but you have never tasted better fudge. Or found fudge that was easier to make!

I have many variations to my fudge; plain fudge, fudge with nuts, peanut butter and chocolate fudge (tastes even better than a Reese’s Peanut Butter Cup if you can imagine that!), white chocolate fudge, you get the picture. And it so easy to make all of these variations of flavors because this fudge is make with chocolate chips! And these days, you can find all kinds of flavored chocolate chips which you can turn in to fudge!
Now, on to the recipe….

Sunshine’s “Secret” Fudge

sunshinessecretfudge

Printable Recipe: Sunshine’s “Secret” Fudge

Ingredients:

  • 3 cups sugar
  • 3/4 cup margarine
  • 2/3 cup evaporated milk
  • 1 12-oz. package chocolate chips (or whatever flavor chocolate chips you desire: peanut butter, white chocolate, mint, etc)
  • 1 7-oz. jar Kraft Marshmallow Cream
  • 1 cup chopped nuts, optional
  • 1tsp. Vanilla

Directions:

Combine sugar, margarine and milk in heavy 2-1/2 quart saucepan; bring to full rolling bail, stirring constantly (and you have to stir constantly or it will burn, trust me!). Continue boiling 5 minutes over medium heat, stirring. Remove from heat, stir in chocolate till melted. Add marshmallow cream, nuts (if desired) & vanilla; beat until blended. Pour into greased 13 x 9-inch baking pan. Let cool and cut into 1-inch squares.

**To make layered fudge (like peanut butter and chocolate, I usually make one batch of each flavor and split it in to two 9X13 pans. Make one flavor first (ex: peanut butter) pour it in to the two pans. Let that layer cool while you make the next batch (I usually put it in the fridge). Make the next batch with the other flavor (ex: choc.) and pour it on top. This way they will not mix in to each other and get all messy.

See, it couldn’t be easier and everyone is SURE to love it! It’s always the go-to holiday recipe for me. I hope you enjoy and have a Merry Christmas!

Party Perfect Walnut Date Cups

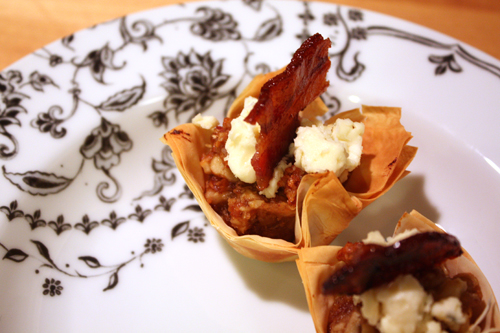
Walnut Date Cups with Blue Cheese and Candied Bacon

Walnut Date Cups with Blue Cheese and Candied Bacon

These fancy little walnut date cups are the perfect savory-sweet treat for a special holiday brunch or cocktail party. It’s a prettier take on one of my favorite easy appetizers, a nut and blue cheese-stuffed date wrapped in bacon and broiled until crispy and caramelized.

For this dressed up version, the walnut and dates are ground together and combined to form the heart of this delightful bite. The mellow, nutty flavor of the walnuts is brought out by the natural sweetness of the dates, and the orange adds a bright, floral note to the mix. The blue cheese is just pungent enough to bring some depth to the flavors, the candied bacon is pure indulgence, and the phyllo cup is a crispy, edible vessel for it all!

Woo woo! Extra bonus, this recipe/video we made won the Video category in California Walnuts’ Holiday Baking Challenge!!! Thanks, Walnuts :) And extra thanks, Hua, for your videography skills.

I did have some trouble getting the candied bacon as crispy as I wanted it (I was shooting for a brittle texture that I could snap into shards). Any consummate bacon confectioners out there who can shed some light?

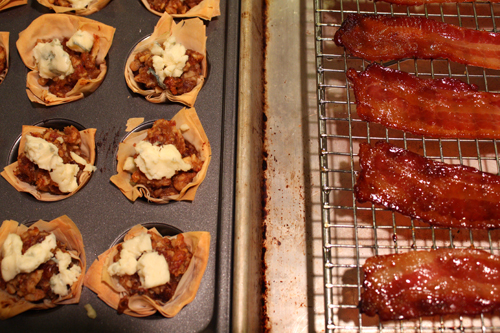
Crispy Nutty Date Cups meet Candied Bacon

Crispy Nutty Date Cups meet Candied Bacon

Walnut Date Cups with Blue Cheese and Candied Bacon

Servings: 24 pieces

Ingredients:
1 cup walnuts, toasted
12 ounces Medjool dates, pitted
1 teaspoon orange zest
2 tablespoons fresh orange juice
4 (18”x12”) sheets frozen phyllo dough, thawed and brought to room temperature
3 tablespoons unsalted butter, melted
½ cup blue cheese, crumbled (Recommended: Point Reyes original blue)
Candied Bacon

Special Equipment:
24-count mini muffin pan
2 baking sheets
Microplane or grater
Parchment paper

Preparation:
1. Make Candied Bacon (see recipe below) and set aside to cool.
2. Place an oven rack in the center of the oven and preheat to 375 degrees F.
3. In a food processor, pulse together the walnuts, dates, orange zest, and orange juice until a coarse, nutty spread is formed. I prefer my filling on the chunky side, but evenly combined.
4. Place a sheet of phyllo dough on a work surface. Brush the dough with melted butter. Place another sheet of dough on top and brush with melted butter. Repeat until you have 4 sheets of dough stacked.
5. Using a sharp knife, cut the dough into 24 (3-inch) square pieces.
6. Gently press each piece of dough into the muffin pan. Spoon the walnut and date filling into the cups.
7. Bake for 12 to 14 minutes until the pastry is golden. Remove from the oven and let the phyllo cups cool for 10 minutes.
8. Using a small spoon, remove the phyllo cups from the pan. Arrange the cups on a platter, top each one with a little blue cheese and garnish with a piece of candied bacon. Serve immediately.

****************

Candied Bacon
Recipe adapted from Alex Guarnaschelli

Ingredients:
3 slices bacon, about 1/4-inch thick (or more, for fun)
1/4 cup brown sugar

Preparation:
1. Preheat the oven to 325 degrees F.
2. Sprinkle the bacon with the brown sugar, coating both sides.
3. Cover a baking sheet with parchment paper and arrange the bacon in a single layer on top. Place a second piece of parchment paper on top, and cover with another baking sheet. The baking sheet will keep the bacon from curling up as it cooks.
4. Place the tray in the center of the oven and bake for 20 minutes. If it is not golden brown and crispy, bake it for another 10 to 15 minutes.
5. Transfer the bacon to a wire rack (not paper towels because the sugar will make it stick) and let it harden up a bit more. Break each strip into small shards. Set aside for garnishing.

Bagel Express (Purveyor of Happiness)

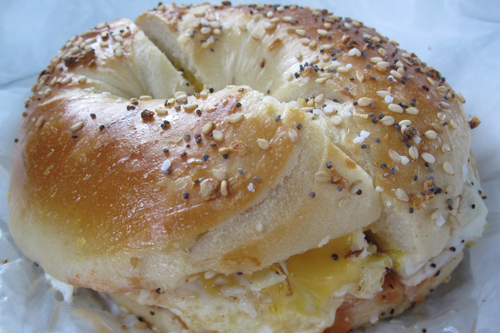
The perfect breakfast sandwich, Bagel Express

The perfect breakfast sandwich, Bagel Express

I was going to take a little holiday respite from blogging while I was home on the East coast but Holy Christmas, this was just too good to keep to myself. Not an hour back in Jerz, straight off the red-eye, and I was walking blurry-eyed into one of my favorite places in the world: a NJ bagel shop.

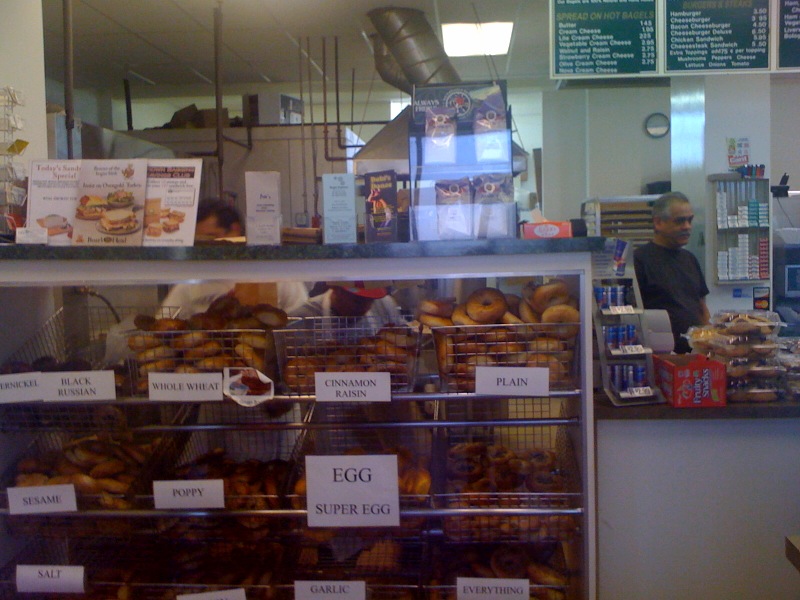
This bagel shop in particular (Bagel Express) is relatively new to the hood, my dad tells me, but it has quickly risen the ranks to Favorite status, and fufills all the Jersey Bagel Shop requisites:

  • Everyone knows everyone’s name. The regulars all come in busting chops and the bagel guys dish out the banter alongside the shmear.
  • At least two cops come in while you wait for your bagel to toast.
  • Every other person on line looks and sounds like they stepped right out of The Sopranos.

Bagel Express, Mahwah, NJ

Bagel Express, Mahwah, NJ

Ambiance aside, what moved me to impulse-post were the mind-blowingly delicious bagels we devoured this morning. A bite of that perfectly boiled and baked, chewy on the inside/crunchy on the outside piece of heaven was like Mother Jersey hugging me to her bosom and welcoming me home.

I know people usually equate bagels with NY, but dare I say (I do, I dare), while the bagel may have gained its fame in NY, it has been perfected in NJ. In Mahwah, NJ to be exact.

At Bagel Express, the texture is sublime. The flavor is nice and salty. The execution is perfect.

I am a purist and got my piping hot bagel with a brick of cream cheese slabbed on and some fresh tomato. Hua and Dad got the classic breakfast sandwich with sausage, egg, and cheese. Hua got a second road sandwich. Told you, these really are that good.

For my Bay Area readers I have a burning question: Why doesn’t SF know about bagels?? They know about every other thing delicious…what’s with the bagel void? Hmmmm?

Ok, signing out. Blissful carb coma has hit.

Sam Sam Korean Food, The Gardens

When I told Diha about cheap korean food at LG floor at The Gardens, she insisted that it's not as nice compared to the korean stall located at the Food Gardens upstairs.
It totally slipped my mind, until I walked past the food court during dinner time recently and realised I've not tried the korean stall.. :p
Sam Sam Korean Food is located very near the entrance, you wont miss it.
Even if you did, you wont miss the 'an nyong ha sye yo' greetings by the owners- a cheerful husband and wife team.
The food selection was very simple- just a few dishes to choose from- ranging from bibimbap, grilled meats and soupy concoction.
They recommended the Dolsat Bibimbap (RM13.90) and Bulgogi Set(RM15)..and so our orders were set..
My Beef bibimbap was served with a fried egg, the yolk still runny...
Mix it all up, and I get a good range of vegetables, rice and meat with every spoonful. The hot stone bowl kept my rice hot and flavourful, it was really enjoyable eating the bibimbap. Very nice indeed.
Amy's Bulgogi came boiling hot...
Slightly soupy looking compared to the rest of the bulgogi I've seen, this was a real wholesome, satisfying dish. The gravy was thick but was excellent with white rice, the beef pieces were tender and gamey (which I like :P) and there were generous amount of glass noodles and vegetables.
Sam Sam Korean Food is located at Stall No 12, Food Gardens, The Gardens, Mid Valley City, Lingkaran Syed Putra, 59200 Kuala Lumpur.

Home's Cafe

This place is cooler than the Old Town nearby. We always ended up going somewhere else due to it's tough to get group seats for our gang during lunch hours.


White Coffee (RM2.60). Not bad! The Home's Cafe brand coffee has always been someone's favourite 3-in-1 coffee. The Hazelnut one will be even more fragant after bancuh.


Teh Tarik (RM3.40) , Kaya Butter Toast (RM2.40). I was surprised to find that the toast is actually not bad, impressed.


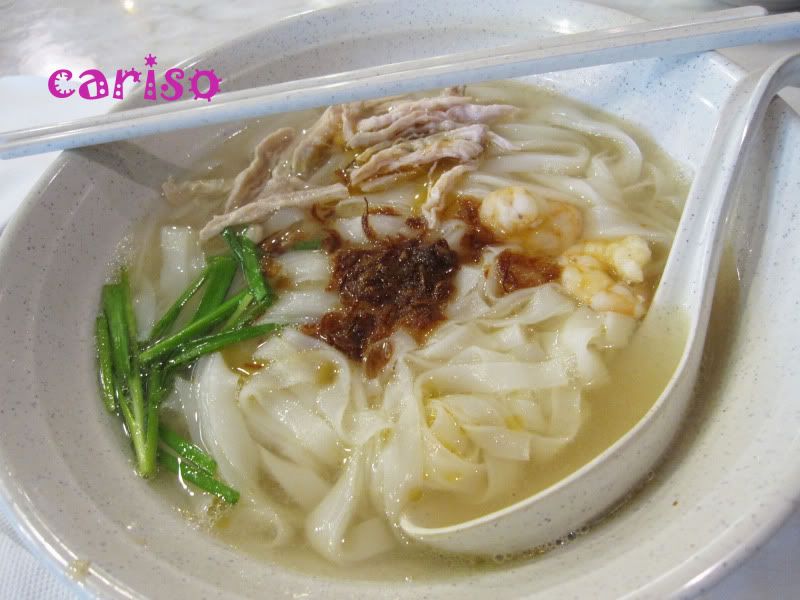
Ipoh Hor Fun (RM5.90). Totally beh khi. Cannot compare with Old Town one at all. Why?! The taste was really one kind, most probably from the hor fun that was not being washed properly. The serving is big but with this weird taste, I definitely won't be back for THIS.


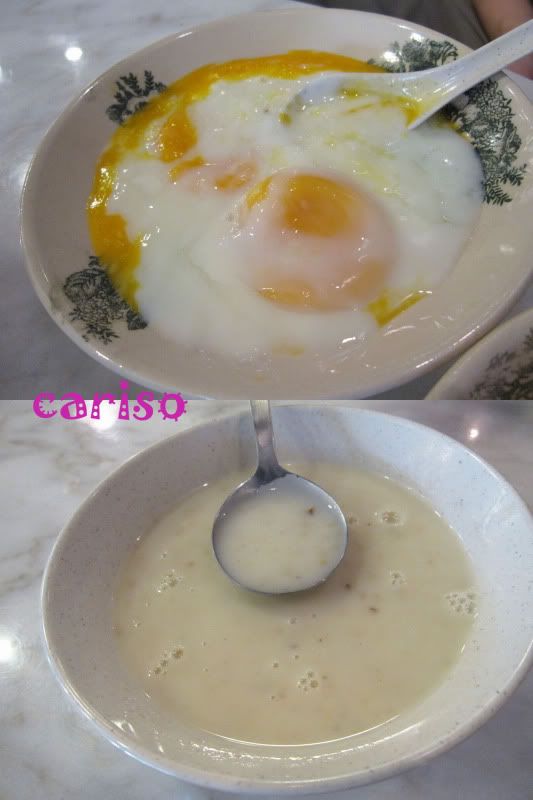
Boiled Eggs (RM2.00), Mushroom soup (RM4.00) . Mushroom was so so, instant type. Boiled eggs, hmm....they let you crack the eggs yourselves. I like it this way.


10% service charge applies. All food items are pork or lard free.

Baked Pasta Cravings

I’ve been craving proper Italian pasta al forno for ages. There’s just one hitch. My kids aren’t really into creamy/mixed sauces… in fact sauces are a bit problematic altogether. The only pasta our son likes is Dad’s aglio olio with bits of bacon in, as it leaves the pasta practically bare, so it doesn’t activate the sauce detector alarm.

When you’re cooking pasta al forno, you need to have an army to feed to make it worth the effort of making meat sauce, making béchamel and then baking it all together with the cooked pasta, so I put off satisfying my craving. And then yesterday I did have an army to feed. The four German students, who have come over with two of their teachers to help at our school for a few weeks, all stayed the night with us so that they could all leave early to drive up to Addo Elephant Park today.

It was nearly a week since I’d shopped. But the teacher we are hosting had cooked spaghetti bolognese for us a couple of nights before and had drastically over-estimated the quantities need to feed a family of five with sauce-averse kids. So there was a ton of meat sauce and loads of parmesan just begging to be used up. I seized my opportunity and it tasted great! So good that we finished up the leftovers cold for lunch today.

Cold pasta al forno, doesn't look as delicious as when it is hot from the oven, but it still tastes great!

Our son declined to even taste it last night, but luckily I’d second-guessed him and shoved some potatoes in to bake alongside the pasta. And I’d thrown together a second pot of pasta for the vegan student with fresh tomatoes, rosemary and chickpeas sizzled in hot garlic oil. And the students made a salad. And I’d baked yet more bread. So it was a feast of carbohydrates that even defeated the three seventeen-year old boys at the table, to produce yet more leftovers.

You don’t have to use a meat sauce for this baked pasta dish. Any sauce with a good strong flavour would work well: roasted vegetables, tomato and basil, porcini mushrooms, whatever you feel like adding to it. It makes sense to make a double batch of sauce, use it to sauce normal pasta one night and keep the rest to make this a couple of nights later, then you don’t have nearly so much work to do for your pasta al forno. The béchamel sauce is quite light and subtly flavoured with nutmeg and only a little parmesan, so it needs a contrasting sauce with a bit of oomph to bring the baked pasta to life.

Recipe for Rigatoni or Penne al Forno

Bolognese sauce made with approx 450g / 1lb meat
Or about 4 cups of pasta sauce of your choice
500g / 1lb penne rigate or rigatoni
750ml / 3 cups milk
90g / 3oz butter
4 ½ tablespoons flour
40g / 1 ½ oz freshly grated parmesan
¼ teaspoon grated nutmeg
4 tablespoons millk
30g / 1oz butter

Preheat the oven to 200C / 400F.

Make your béchamel first. Melt 90g butter in a heavy based pan. Stir in the flour and keep stirring for about a minute so it cooks, but don’t let it turn dark. Add the milk a little at a time, giving it a chance to warm on the base of the pan and then stirring it in well, before adding the next lot.

Most recipes tell you to heat the milk separately before adding it, which is sensible, but I learned from a friend that if you give it a chance to warm on the base of the béchamel pan before you stir it in it works just as well.

Keep adding milk and stirring it in until it is all incorporated, then carry on stirring until the béchamel thickens to a thick pouring cream consistency. Season with pepper, salt and nutmeg then stir in half the parmesan. Taste to check the seasoning.

Cook the pasta till it is al dente. Take care not to over-cook it, or it will collapse to a dense solid indigestible mass when baked. You want the shapes to hold up and trap the sauces nicely. Toss the pasta with the warmed meat sauce and then with about two thirds of the béchamel.

Tip the sauced pasta into a roasting tin buttered with the remaining butter. Level it off. Pour the milk over, then pour the rest of the béchamel on top. Sprinkle with the remaining parmesan. Bake for 20-30 minutes until golden and bubbling. Let it rest for at least five minutes before serving.

Yogurt Raisin Bread


Yesterday afternoon, I had the strangest encounter with a door to door salesman. The doorbell rang unexpectedly, and even though I knew this usually portended someone advertising vacuum cleaners or a magic stain remover, I always feel beholden to open the door just in case it's a neighbor or a small child fundraising. Thus resigned, I tugged the door aside to reveal a man in an AT&T Telephone Company shirt squinting at a large clipboard. Glancing at me, he read my name from the clipboard in an enquiring manner, so I answered in the affirmative... and he then proceeded to stare at me openly and unabashedly.

Finally, he broke the silence: "but...you're a girl."

Somewhat taken a back, I answered simply "um, yes..."

"But," he continued to stammer, "I, I thought you'd be some big Spanish dude."

I resisted the temptation to explain to him that words and names ending in the letter "a" are, in Spanish, typically female, not male. Instead, I simply attempted to recover my composure, and settled with "well, no..."

He continued, however to insist that he might be dealing with an instance of mistaken identity. "I thought," he persisted, "I thought you'd be some big Spanish dude... with a ponytail."

Perhaps AT&T needs to reevaluate their sales training protocol?

After sending the unfortunate salesman back down the driveway as rapidly as politely possible, the only reasonable response seemed to be to head straight for the kitchen to bake bread. Simple, unflustering, nourishing, slightly sweet and pillowy soft bread. At least some things always make sense... :-)


Yogurt Raisin Bread

2 eggs
1/3 cup fat free blueberry yogurt
2/3 cup 1% milk
2 tsp vanilla
1/3 cup applesauce
1 cup whole wheat flour
1 cup all-purpose flour
1 tsp baking soda
2 tsp baking powder
1/8 tsp salt
1 cup raisins

~ Preheat the oven to 325 degrees. Coat a 9X5" loaf pan with cooking spray and flour.
~ Whisk together the eggs, blueberry yogurt, milk, vanilla, and applesauce until well blended.
~ Stir in the flours, baking soda, baking powder, and salt until just combined.
~ Fold in the raisins.
~ Scoop the batter into the loaf pan, and bake for 45 minutes - until a toothpick inserted in the center comes out clean. Turn the bread into a wire rack to cool, or simply serve the bread nice and warm, right away... :-)

Cham Korean Bistro: Pasadena's clean New Year's eating

Korean rice cakes are starchy, but accompanied with cruciferous vegetables -- "colon's little brooms," says Mario Batali.

At the start of the year, it seems like everyone is suddenly vowing to start "eating clean," posting Facebook resolutions to give up sugar and twittering ambitious exercise plans.
Here's one place to start: Cham Korean Bistro, a five month-old Korean fusion spot. The clean-lined space is just off Lake St., so it qualifies for the cardinal rule of Pasadena eating: Try to get out of Old Town.
Order dishes like bibimbap or a ssam garden bbq platter with beef, chicken, pork or tuna at the counter, then choose a booth made from minimalist laquered plywood. I tried toppoki ($6), a fat cylindrical rice cake that's like a chewy Korean gnocchi, slicked with a sweet teriyaki-type sauce and mixed with either beef or vegetables. Several dishes have a unusual touch, like the big crab claw trying to climb out of my cup of miso soup ($3). Miles' bibimbap (above, $10) and Colleen's short rib Korean stew ($12) were fresh and colorful, but maybe a little more plain and healthy-tasting than in a typical Koreatown joint. Like many places in Pasadena, Cham seems a touch more pricey than it needs to be, but in this case at least there's a good reason: The owner, a garment business entrepreneur, runs the restaurant as a non-profit and donates most of the proceeds to developing countries. After our lunch, the server delivered a bonus slice of creme fraiche cheesecake with a really nice milky tang to it -- not particularly healthy, but worth the indulgence. Sure, you can eat cheaper in Koreatown, but this is clean, healthy food -- perfect for ushering in a vegetable-intensive 2010.

New Chong Quing: Going beyond the hot pot

A darn fine bowl of dan dan noodles for $3.99

Will it displease the gods of Chinese food if we go to a Sichuan hot pot restaurant and do not order a hot pot? Perhaps, especially since the requisite framed Jonathan Gold review on the wall of New Chong Qing is titled "New Hot Pot Spot." But after an 80 degree winter day, we're not in the mood for hot pot, so tough. What we are in the mood for is dan dan noodles, and New Chong Qing is said to have some of the best in the area. New Chong Qing is in a modern mini-mall, and with a brief laminated menu and wall decorations of empty Ikea frames and neon post-it note doodles, it has a slick, yet improvisational quality. The menu translations are some of the most amusing around, from pig waist to a drink called something like Manifold Destiny.
Dan dan noodles are just $3.99 a bowl, so order two -- it's not a large portion, and though they're rich and greasy, you'll likely want more of the nutty, slightly numbing, slick herbal mixture. If the gods are angered because we ordered Kung pao chicken (above), then so be it: This is a tangy dish of chicken, garlic and chiles with no peanuts or sugary, goopy sauce to be found. Ma-po tofu over rice has a similar flavor profile to dan dan noodles, so maybe we should have tried green beans or other vegetables instead. But since that profile is complex, spicy and flecked with alluring Sichuan peppercorns, there's no cause for complaint. New Chong Qing doesn't have the hottest food around or the largest menu, but for a quick bowl of satisfying noodles at lunch or dinner, it's just the spot. There's no beer, but Matt was happy with a blueberry slushie. We'll take more people and try to balance the dishes better next time -- oh yeah, and maybe even a hot pot.

Rice Pudding-Tea


Last night I was feeling seriously under the weather but stubbornly marched myself off to work anyway, rationalizing that I didn't have a fever (yet) although I did have quite the case of the sneezy snifflies. Throughout the shift, my co-worker, Shannon, who is one of the sweetest people on the planet, diligently and generously chimed in with "bless you" every time I sneezed. The only issue that arose was that my feeble little coughs sounded remarkably like sneezes, and so Shannon was forced to kindly inquire "was that a sneeze, or a cough?" at regular intervals. Out of compassion for Shannon I finally proposed the following stellar plan - every time I coughed, I would simply follow the act with an exclamation "cough!" in order to clarify any confusion. In my loopy, 3AM state I was quite pleased with this plan, but about that same time my other co-worker, Lucia, took pity upon me and gave me a cough drop, and so I wasn't actually able to put my plan in place for the rest of the night... but I'm still quite convinced that it remains a flawless system, at least on a theoretical level.

The end result of this History of Astra's Night of Illness ultimately equated, as you might guess, to me spending most of the day today huddled in bed with a burning sore throat and an alarmingly high temperature, and finally being forced to call in sick to work this evening. Thankfully, I've been blessedly healthy my entire life, and I fully recognize that I have absolutely no right to complain about something so minor as a fever and a sore throat, but still, I don't seem to handle being sick well - I always feel inordinately frustrated with myself, as though I somehow let everyone down by temporarily succumbing to illness. I also feel the need to clean the house obsessively, as though by expunging the carpet of germs I will also manage to banish all virulent microbes from my system. Then, of course, there are the unfortunate days when I feel so wobbly on my feet that I'm forced to put aside the vacuum cleaner and the laundry soap... and I do believe tonight is one of those nights.

Alas, I thus must humbly confess that I haven't a recipe for tonight... Zach just called and instructed me to take zinc and echinacea and go straight back to bed, so I suppose I ought to do just that. While this isn't a proper recipe, I do, however, want to share with you something comforting and cozy... Along with herbal tea with lemon and honey, my other favorite restorative, soothing beverage is rice pudding-tea. A cross between rice pudding and warm milk, this cozy, earthy, simple, vegan-friendly warm bit of comfort in a mug was first prepared for me by my college roommate, Lisa, who saw me huddled over my desk, studying for final exams while battling the flu, and immediately installed me in a more comfortable chair and oh so kindly handed me the sweet-spicy, warm depths of this pudding-tea...

A Recipe for Easy Baked Eggplant Parmigiana

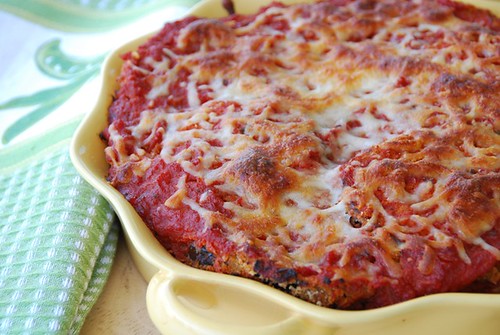
baked epplant parmigiano

I realize that most of the country is melting right now, and that everyone is looking for no-bake dinners and salads. But sometimes, in spite of the heat, a girl's gotta have some warm, belly-filling, Italian comfort food, like eggplant parmigiana, or more affectionately, eggplant parm. As far as I'm concerned, eggplant parm is a year-round food, but it's the best from August-October, prime eggplant season.

Eggplants have a long history. The earliest ones were grown in India between 4,000-5,000 years ago. Eggplant was introduced to the Mediterranean region in the early Medieval period. That's when Italians discovered eggplant, and they still prize it for its rich, creamy, flavorful flesh.

Eggplant parmesan, also known as melanzane alla Parmigiana or Parmigiana di melanzane, is a treasure of Neopolitan cuisine. It consists of thick slices of breaded eggplant that are fried in olive oil until golden then layered with tomato sauce, mozzarella cheese, and basil and baked until bubbly.

In the US eggplant parmigiana is most commonly found at pizzerias, delis, and Italian-American mom-and-pop restaurants. It's typically inexpensive, delicious, and satisfying, but not low-cal. So if you love eggplant parm, but don't love the calories that come with it, then make your own baked eggplant parmigiana.

As for the hot weather, just crank your AC, then make a big batch of eggplant parm in your comfortably cool kitchen.

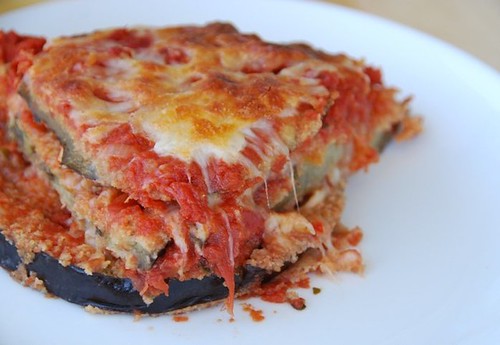
epplant parmigiano serving 2

Baked Eggplant Parmigiana
Serves 4
Print recipe only here.

Traditionally, eggplant is fried in oil on the stove top. However, baking it drastically reduces the calories and fat without sacrificing flavor. Plus you get to eat more.

Eggplant:
2 large eggs
a pinch of crushed red pepper flakes
a couple of pinches of salt
3/4 cup bread crumbs (preferably plain)
1/4 cup grated Reggiano-Parmigiano cheese
1 large eggplant, cut into 3/8-inch thick slices (yield 10-12 slices)

Marinara Sauce:
2 teaspoons olive oil
1 shallot, diced
1 (28 ounce) can crushed tomatoes, preferably San Marzano tomatoes*
1/4 teaspoon crushed red pepper flakes (more if you like some heat)
a couple of pinches of salt
2 heaping tablespoons each of finely chopped fresh basil and parsley
3/4 cup shredded part-skim mozzarella cheese
1/2 cup grated Reggiano-Parmigiano cheese

1. In a small bowl, whisk eggs, crushed red pepper, and salt. Pour into a wide, shallow bowl or plate.

2. Mix breadcrumbs and 1/4 cup grated cheese in a separate wide, shallow bowl or plate.

3. Slice eggplant. Dip one slice at a time in the egg mixture, allowing excess to drip into the bowl. Dredge in the bread crumbs, ensuring that the entire slice of eggplant is coated with the crumbs. Place on a large baking sheet. Repeat with remaining slices.

4. Bake eggplant at 400 degrees F for 15 minutes, or until golden and crisp.

5. While the eggplant is cooking, the marinara sauce can be made. In a medium pot over medium heat, warm 2 teaspoons olive oil. Add shallots and saute 2-3 minutes or until translucent. Add the canned tomatoes, crushed red pepper flakes, and salt. Stir until well combined. Reduce heat to medium-low. Let sauce lightly bubble for 8-10 minutes, or until slightly thickened. Turn off heat. Stir in the fresh herbs.

6. To assemble the eggplant parmigiano, use either one 9-inch round or 8-inch square baking dish. Start by covering the bottom of the dish with a layer of marinara sauce. Add 4 slices of baked eggplant (larger slices on the bottom), and top with 1/3 of the shredded mozzarella and 1/3 of the grated cheese. Repeat two more times, or until all ingredients are used.

7. Bake at 400 degrees F for 25-30 minutes, or until the sauce begins to bubble and the cheese turns golden brown. Allow to cool for 10 minutes before slicing.

*San Marzano tomatoes are Italian plum tomatoes that are prized for their sweeter, less acidic flavor. They can be found in Italian specialty markets and some major supermarkets.

Recipe Favorites: Ground Beef and Sauerkraut Soup


Ground Beef and Sauerkraut Soup(Updated and added to Recipe Favorites January 2010) This is one of the Phase One recipes you could find in the new Index of South Beach Diet Phase One Recipes from Kalyn's Kitchen, and I first featured it on the blog in January 2007. Since then the recipe has accumulated a lot of fans. A faithful reader recently told me that she makes it every time she does Phase One, and mentioned it deserves be a recipe favorite. Then I made it over the weekend for my annual New Year's Day soup party, and a lot of people there raved about it too. When I went to lunch today with my friend Bonnie she told me her husband George loved this soup at the party. The signs from the universe are clear; it's time for this soup to be officially made a recipe favorite.

When I pick recipes to add to Recipe Favorites I usually look forward to updating the photo with a better one, but this time when I looked at the post I liked the original photo for this soup too, so I'm keeping it. I always eat this with sour cream, and I remember when I photographed it the first time I couldn't get the sour cream to look right so I used a photo without it! Sour cream or not, if you try this recipe it might become one of your favorites too!

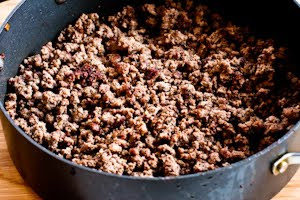
Start by heating the oil, then cooking the ground beef until it's well-browned. Don't rush this, because browning adds flavor. (This is the batch of soup I was making for the party, so in these photos the recipe is doubled.)

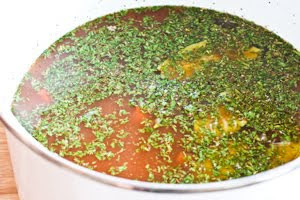
While the beef is browning, start simmering the two kinds of stock, canned tomatoes, sauerkraut, Splenda or brown sugar, Worcestershire sauce, bay leaves, parsley, and dried sage.

When the beef is well-browned, add it to the soup pot and let the soup continue to simmer.

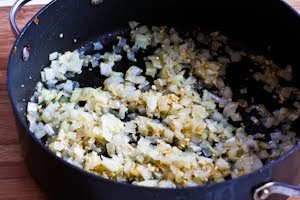
Heat more olive oil in the frying pan and saute the chopped onions 2-3 minutes, then add the minced garlic and saute 1-2 minutes more. Add the onions and garlic to the soup and simmer on low about one hour. (You want the sauerkraut to soften until it's almost melted into the soup.)

After an hour taste the soup to see if it seems too strong and add some water if needed. (Simmer a little longer if you add water.) Season to taste with a generous amount of fresh-ground black pepper and serve hot, with or without sour cream.

Ground Beef and Sauerkraut Soup
(about 8 servings; I know I was inspired by a recipe I saw somewhere, but I can't remember where I saw it!)

1 lb. very lean ground beef (less than 10% fat)
2-3 tsp. olive oil (depends on your pan)
1 cup chopped onion (one large onion)
1 T minced garlic (or less if you're not that fond of garlic)
2 cups homemade chicken stock
(or 1 14 oz. can chicken broth)
2 14 oz. cans beef broth
1 14 oz. can diced tomatoes with juice
(I like Muir Glen Organic Fire Roasted Tomatoes)
1 14 oz. can sauerkraut with juice (or use bottled sauerkraut)
1 cup water (if needed)
1 T Splenda or brown sugar (use Splenda for South Beach Diet)
1 T Worcestershire sauce
3-4 dried bay leaves
3 T minced parsley or 1-2 T dried parsley
1 tsp. rubbed sage
fresh ground black pepper to taste

In heavy frying pan, heat 1 tsp. olive oil, add ground beef and brown well, breaking into small pieces with turner. This will take as much as ten minutes but don't rush the browning step.

While ground beef browns, combine chicken stock, beef stock, canned tomatoes, sauerkraut, Splenda or brown sugar, Worcestershire sauce, bay leaves, parsley and sage in large stock pot. Bring to a low simmer.

When beef is well browned, add to soup in pot. Deglaze pan with a bit of the soup liquid, scraping off any browned bits, and add to soup.

Wipe out frying pan and add other 2 tsp. olive oil. Saute onions 2-3 minutes, until starting to soften, then add garlic and saute 1-2 minutes more. Add to soup, reduce heat under soup pot and let soup simmer at low heat about one hour. After an hour, taste for seasoning and add water if soup seems too strong. Simmer 15 minutes more if adding water. Season to taste with fresh-ground black pepper before serving. Serve hot, with sour cream if desired.

The Nun's Revenge

No blasphemy here. That is honestly the name of the drink. This Italian hot chocolate is so delicious and indulgent, it is assumed it can't be chaste! In fact the author has compared drinking it to a religious experience :-)

I really didn't need further encouragement but as luck would have it, Padmaja's fabulous Fairtrade Goodie Bag arrived in the mail (thank you dear!). Nestled between the coffee and tea was a gorgeous bittersweet chocolate. Sign from above!

chocolate

THE NUN'S REVENGE
(adapted from 'Hot Chocolate: 50 heavenly Cups of Comfort')
(serves 2-3)
1/2 cup plus 2 tablespoons half-and-half*
1 tsp arrowroot
1 tbsp sugar (adjust to taste)
2 ounces fairtrade bittersweet chocolate (at least 70 percent cacao), chopped
2 to 4 strips orange zest for garnish

In a small bowl, combine 2 tablespoons of the half-and-half with the arrowroot, whisking until smooth.

Place the remaining 1/2 cup of half-and-half in a small saucepan over medium heat. Bring to a simmer. When the half-and-half begins to bubble around the edges, whisk in the sugar. Whisk in the arrowroot mixture until the half-and-half thickens slightly, usually less than a minute.

Remove from the heat and quickly whisk in the chocolate until smooth. Pour into cups, top each with a piece of orange zest, and serve immediately.

hotchoc2

* Revenge is best served... cold with low fat substitutes. So feel free to use your choice of milk. The arrowroot makes the drink creamy anyway.
* Use orange flavored liqueur or orange extract if you prefer.
* Beer is usually the drink of choice on game nights but I am sending this over to Mansi anyway for her Game Night Party event.
* Don't forget to Click liquids for January.

Spilling the 'Beans' - Peshawari Biryani

Yes, I am finally sharing the recipe I promised here. It's a biryani with an identity crisis! When my sister in law gave me the recipe she said it was called Peshawari Biryani in the magazine she read. Jiggs Kalra makes it with kala chana and calls it Kale Moti Biryani in Prashad. And somewhere on the web it might be even referred to, rather uncharmingly as, Veg. Biryani. A rose by any other name etc. etc...

I made this biryani with kidney beans (rajma) the first time and felt they were too 'beany' for the delicate basmati rice. So this time around I used sprouted moth beans (matki). They complement the rice in taste as well as size. This is in fact one of the best things about the recipe. You can use pretty much any legumes in your pantry without compromising on the taste. The next time I plan to go a step further and combine the beans with fenugreek instead of cilantro.

Where does the casserole come in? I finish cooking the biryani on 'dum' in the oven. But the recommended 'unlayered' serving is a visual treat for parties.

biryani

PESHAWARI BIRYANI
(recipe from my sister in law)
(serves 2-3)
Rice -
1 cup basmati rice
1 tsp ghee/ butter
1" cinnamon, 3 cloves, 3 cardamoms
fried nuts/ onions (optional)
Beans -
1/2 cup beans of your choice (garbanzo, kidney, peas, moth etc.)
1/8 tsp turmeric
1/2 tsp red chilli powder
1 tsp ginger garlic paste
2 tomatoes, peeled and pureed
a handful each of cilantro and mint, washed and finely chopped
1/4 tsp good quality garam masala
salt to taste

Soak beans overnight. Drain and wash the next morning. (Sprout them in a colander if you wish to). Combine with enough water and cook on moderate heat until tender but able to hold their shape. (You can pressure cook beans as long as they don't turn to mush). Reserve cooking liquid.

Heat oil in a pan. Add turmeric powder, red chilli powder and ginger garlic paste. Saute on low heat until combined. Next add herbs and saute until fragrant. Add puree and beans. Stir and cook on medium heat until thick. Season with salt and continue stirring until beans lose most of the moisture. Sprinkle garam masala and set aside.

Wash rice in 1-2 changes of water. Drain and set aside. In a sauce pan heat ghee and drop in the whole spices. Add rice, saute for a minute. Add 2 cups of cooking liquid and bring to a boil. Cover and cook on low heat until rice is done.

For serving spoon rice onto a large platter. Make a well in the centre and place beans. Garnish with fried nuts and serve with a raita.

Cooking with a wise herb

2008 appears to be a year for unexpected gifts. It started with chocolate, then decadent mango burfi from my sister in law and most recently, sachets of dried sage (get the bad pun in the title?) from the lovely Jaden. And it's only February. Hopefully the year of the Rat will continue to bring more goodies (hint).

kale

I have been cooking all sorts of greens lately. So much that the cashier at the store asked me if I was going to use the kale and chard for an 'arrangement' like lemons! Gosh no. Methinks kale looks better in the pot than the vase.

Cannellini beans and kale is a Tuscan classic. The smooth beans complement the woodsy kale nicely. Though I prefer mashed comfort you can keep the beans whole and serve it as a soup with a little elbow pasta thrown in. Leftovers make a great pizza/ tart topping.

beansandkale2

CANNELLINI BEANS AND KALE
(serves 2-3)
1 15-oz. can of cannellini beans (or fava/ Great northern etc)
2-3 garlic cloves, minced
1 medium yellow onion, chopped
half bunch of kale, picked, washed and roughly chopped* (or broccoli rabe/ spinach etc)
1 tsp dried sage
3 tbsp extra virgin olive oil + extra for drizzling
salt and freshly milled pepper to taste

Heat oil in a pan. Add minced garlic and onion. Saute till onion turns pink. Add kale and 3-4 tbsps of water. Cover and cook until leaves are tender (this takes anywhere between 7 to 10 minutes. Check periodically).

When kale is done, add beans and sage. Season to taste. Cover and cook for 3-5 minutes for flavors to blend. Remove from heat. Mash beans with a potato masher until smooth. Spoon onto a serving plate, drizzle with olive oil and cheese. Serve with crusty bread.

* Kale requires a slightly longer time to cook depending on how mature the leaves are. I remove the stalk and tough stems, roughly chop it into strips and steam it until tender.

Something's fishy - Salmon Croquettes

Though the pink fish is much loved by both the husband and I, I never really took to cooking it at home. It took just one recipe to change the status quo. A recent issueof Cooking Light had an easy and healthy recipe for salmon croquettes. What do I say about CL? Love their lo-cal take on food.

I didn't use as much mayo as listed in the recipe and omitted the flour altogether. Still the croquettes were delicious. Paired with a spinach salad they made a quick, light weekend lunch. Plus this was one time we didn't miss carbs at all!

Just remember that the mixture should be squishy. Don't keep adding flour/ crumbs until you can shape the patty well, because the croquettes firm up as they cook.

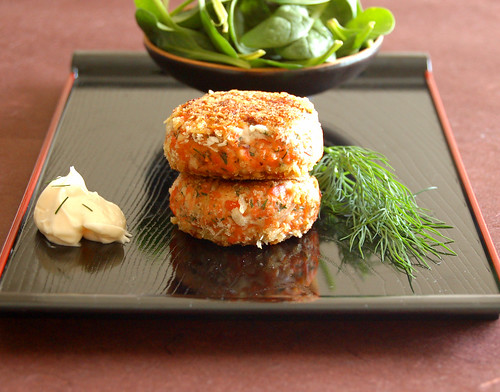
salmoncake

SALMON CROQUETTES
(makes 6)
2 wild salmon fillets (or a 15 oz. can)
2-3 tbsp baby dill, chopped
2 tsp lite mayo
1/2 tsp Dijon mustard (optional)
1 egg white
2-3 tbsp dry bread crumbs plus more for dredging
salt and pepper to taste
olive oil or cooking spray for frying

If you are using fillets, heat a pan and coat with spray. Place salmon skin side down and turn the heat to medium high. When you see the skin begin to peel remove pan from heat. Let cool and peel skin off.

Place salmon in a large bowl and mash with a fork. Add remaining ingredients and season to taste. Shape into patties, cover with film and refrigerate for 30 minutes.

Heat a skillet and coat with oil or spray. Dredge patties in crumbs lightly and place on pan. Cook on each side until golden brown. Serve with mustard or horseradish sauce.